Assembly & Fitting Instructions for Ecoease DIY secondary double glazing
After unpacking the parts for your secondary glazing panel, complete the following steps to assemble and install the units.
These example sizes given are for demonstration purposes only. This means they should be replaced with the finished sizes of your panel. Example Size of Finished panel = 900mm high x 450mm wide
Assembly of the panels
 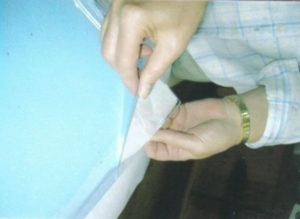 Step 1:Â
First peel back the protective film on both sides and on all four edges of the panel by approximately 40mm.
Step 2:
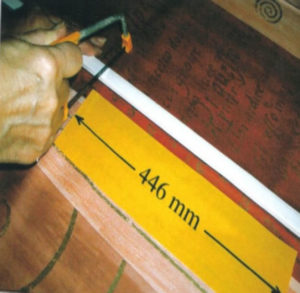 Next remove the steel strip (with the blue backing) from the rubber magnetic strip on the back of the white PVC edging. Then store this safely to avoid damage. Now set the PVC strip on a suitable work surface and calculate the width it should be cut to as follows:
Calculate: Take 4mm from the finished panel width (the one you gave us when ordering not the width of the PET you have received) e.g. in sample size 450mm minus 4mm = 446mm.
Next using an appropriate saw carefully cut two strips to this dimension.
Step 3:
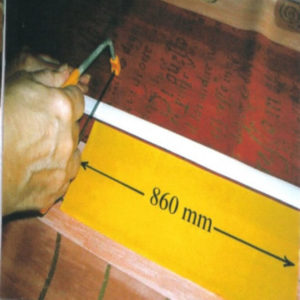 Now calculate the height the other two edge strips should be cut to as follows:
Calculate: Take 40mm from the finished panel height (again the one you gave us when ordering not the height of the PET you have received.) For example, in sample size 900mm minus 40mm = 860mm.
You can now use an appropriate saw to carefully cut two strips to this dimension.
Step 4:
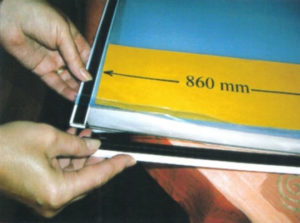 Next, insert the slotted sides of the PVC strips onto their appropriate edges of the panel. AÂ soft mallet is helpful at this stage.
Step 5:
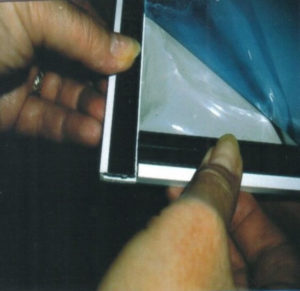
Gradually position the strips together by pressing the edge strips until touching at the four corners of the panel. As you do this the ends of the longer strips should allign with the inner edges of the shorter strips. Once in place the panel should now measure just 2mm smaller than your finished sizes in each direction. This allows for width of the corner pieces.
Step 6:
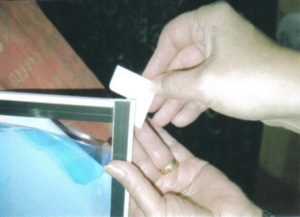
When you have achieved the required dimensions, fit the four corner pieces. To do this remove the backing from the adhesive pads. Carefully position the corner on the white PVC side of the unit ensuring it goes right up to both edges and press on.
Step 7:
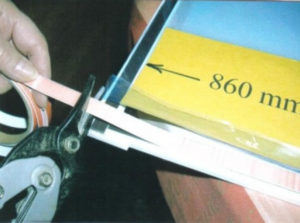
Now apply the metal strip back to the panel by laying it along the rubber magnetic strips. We suggest that you do the longer sides first allowing the joins to be covered. Cut the strip to size using an appropriate set of scissors. Once the two longer strips are replaced cut the smaller ones to fit and attach.
Step 8:
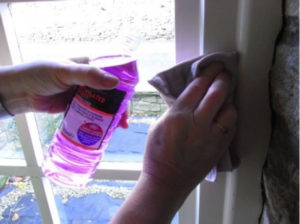
Clean the surfaces around the window frame that you will be fixing the panel to with methylated spirits or similar degreaser.
If you would like us to do all of the above for you then choose our Measure to Fit fully assembled secondary glazing.
Get ready to fit your panel
Slowly remove the surface protection film from the side of the sheet with the magnetic tapes. If you do it quickly it creates static and dust will fly to it. If you do create static and dust you can clean the surface using some furniture polish such as Pledge or similar. Use a SOFT damp cloth – microfibre is ideal. The polish will remove the static and the soft, non-abrasive cloth will get rid of the dust. Do NOT use the dry cloth on its own and, NEVER use anything with an abrasive in it to clean your PET panels.
Remove the blue adhesive film backing from the steel tape.
Under no circumstances put the white steel tape onto the window frame on its own. You will never match up the steel and magnetic tapes perfectly if you do this.
Now fit your Ecoease DIY panel
Line up the panel against the frame using supports where necessary – or better still – an extra pair of hands!
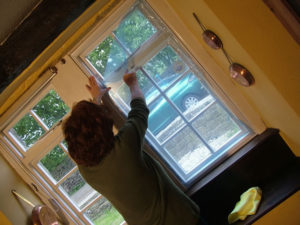 When you are sure you have the panel exactly where you want it, apply light pressure to stick it to the surface of the frame. Now run around the edge applying as much pressure as possible. You can do this simply with your fingers – or use a narrow wallpaper roller.
Finally remove the surface protection film from the outside of the sheet. Again we advise that you do this slowly to minimise any static electricity.
If you need any help with these fitting instructions for DIY Ecoease, give us a call on 01536 446398 and we will be very happy to help.


